If you are reading this article, you have probably installed the “Facebook for WooCommerce” plugin and want to find out how to synchronize your Product Catalog with your Facebook Page or Instagram Channel to sell online.
Or you did a Google search by typing one of these keywords:
- woocommerce for facebook
- facebook for woocommerce pixel
- facebook for woocommerce support
- facebook for woocommerce tutorial
- facebook for woocommerce wordpress plugin
- woocommerce facebook pixel
Regardless of how you came to this article surely you are interested in acquiring customers and increasing sales of your online store made with WooCommerce.
Facebook for WooCommerce: Items to be defined before installation
As expected in all Marketing Strategies, one of the key elements is to prepare a budget and define the elements behind the strategy.
Otherwise we run the risk of not achieving our goals.
In fact, it is not enough to create your own online store and connect WooCommerce and Facebook.
It is important to define what actions we intend to take to increase sales of our online store, taking advantage of the “amplifier” effect of the two social channels.
The WooCommerce Facebook and Instagram plugin, can pay off if a number of conditions are met.
Define your Target Audience
Do we have a large potential audience (fan base) on target? Check now how many followers you have on Facebook and Instagram and their interactions.
The strength of a social channel is not in the number of followers, but in their engagement. What marketeers call engagement.
If we have 10,000 followers and zero interactions (likes, comments and shares) something is not right.
More so, if we have a few hundred followers, unfortunately the number of possible sales will be extremely low.
Implement Social Media Strategy
It is important to define a Social Media Strategy to increase our fan base (see previous point), increase engagement and reach potential audiences.
It is crucial to keep in mind that selling is based on creating a relationship of trust(Inbound Marketing) between the Brand and the person.
It may be useful, not to say essential, to plan to carry out ADV Campaigns to intercept our potential audience and acquire new customers.
Now let’s see how to synchronize the product catalog thanks to the WooCommerce plugin Facebook Shop.
Use the Facebook for WooCommerce plugin to connect WooCommerce to Facebook and Instagram
Facebook for WooCommerce setup: let’s see together how to perform the installation in 12 steps:
- Perform the installation of the Facebook for WooCommerce plugin,
- Connect your Business Manager, related channels and advertising accounts
- Connect the pixel WooCommerce Facebook
1. Domain verification
To link your online store to Facebook and Instagram, first it is essential to do a domain check, that is, the site on which the products to be sold are located.
1.1 Add your domain in Business Manager
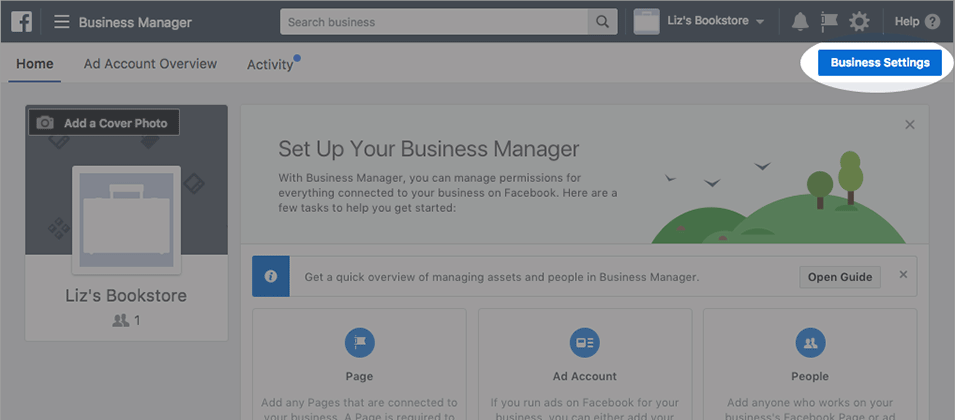
Step 1. In Business Manager, click the Business Settings button in the upper right corner.
Step 2. In Corporate Settings, select the Brand Security tab and select Domains from the navigation list on the left.
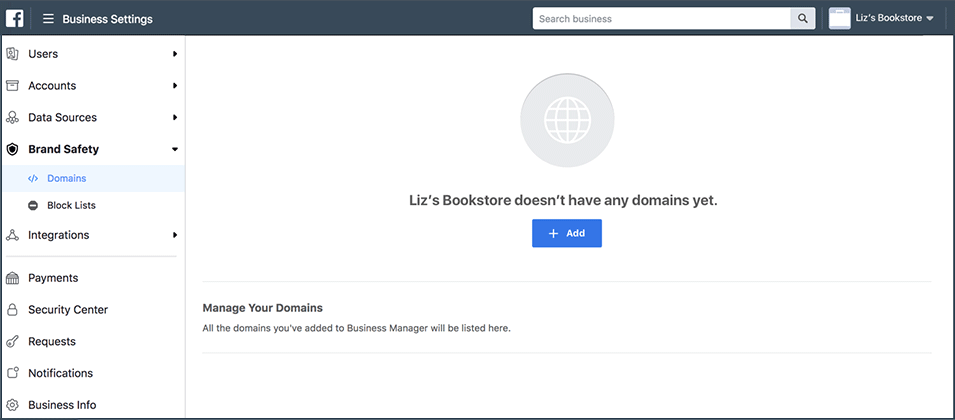
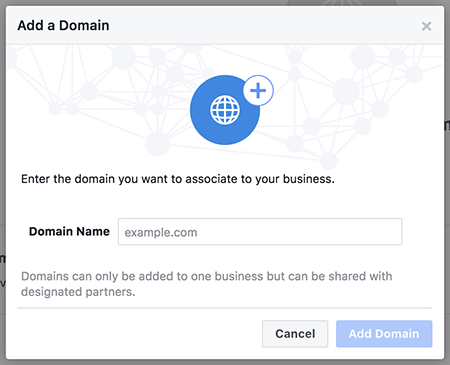
Step 3. Click the Add button and enter your domain in the Add a Domain pop-up dialog box.
If you have more than one domain listed, select the domain for which you wish to confirm ownership.
1.2 Verification of your e-commerce domain
As is the case in so many cases, there are 3 different methods of performing domain ownership verification:
- Add a TXT DNS entry to your DNS record to confirm that you are the owner of the domain. In this case, it is essential to be able to access the DNS management panel;
- Upload an HTML file provided by Facebook to your web directory and confirm domain ownership in Business Manager. In this case you only need to be able to access the site directories and upload the file via FTP with an application such as FileZilla.
- Add a meta tag to the section of your domain’s home page. This operation may be easier. It depends on which template you have installed. Generally there is a specific area that allows you to add the code to the section.
2. Facebook for WooCommerce what is it
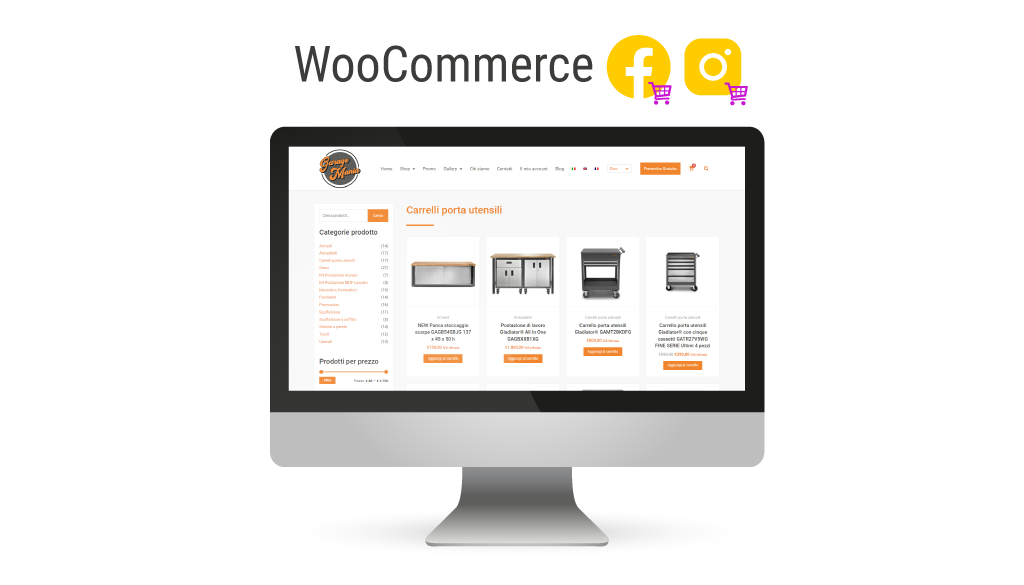
The Facebook for WooCommerce plugin connects the store made with WooCommerce to Facebook and Instagram.
This allows us to expand, greatly, our potential audience, acquire customers, increase sales.
With the plugin you can help people who visit your social channels discover your eCommerce store and measure the results of the actions customers take on your website.
In detail you can:
- Sync your product catalog with Facebook Business Manager thanks to the WooCommerce product feed for Facebook. This allows customers to browse your products on both your Facebook Page and Instagram account
- Create targeted product-based ads, consequently increasing sales and new customers
- Install Facebook pixel for WooCommerce to support retargeting ads and monitor the effectiveness of your ads
- Use Facebook Messenger to chat with customers about your store or on Facebook and provide lots of useful information
- Create specific Product Sets to convey Promotions, Special Prices, Special Editions etc.
Installation
3. Facebook for WooCommerce setup
Now let’s look together at the different steps to install the plugin.
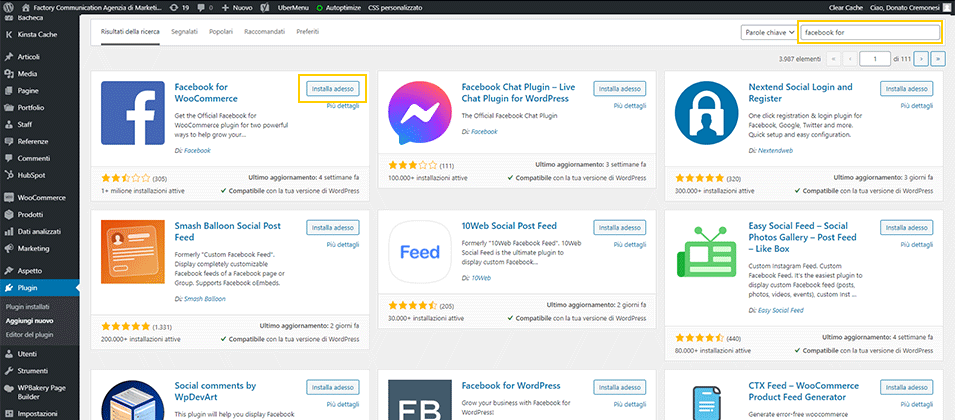
Go to the Plugins section of WooCommerce, click the “Add New” button.
In the search field highlighted in the yellow box at the top right, type “Facebook for WooCommerce.”
Several plugins will appear. Install the one highlighted in the image, with the yellow box on the left.
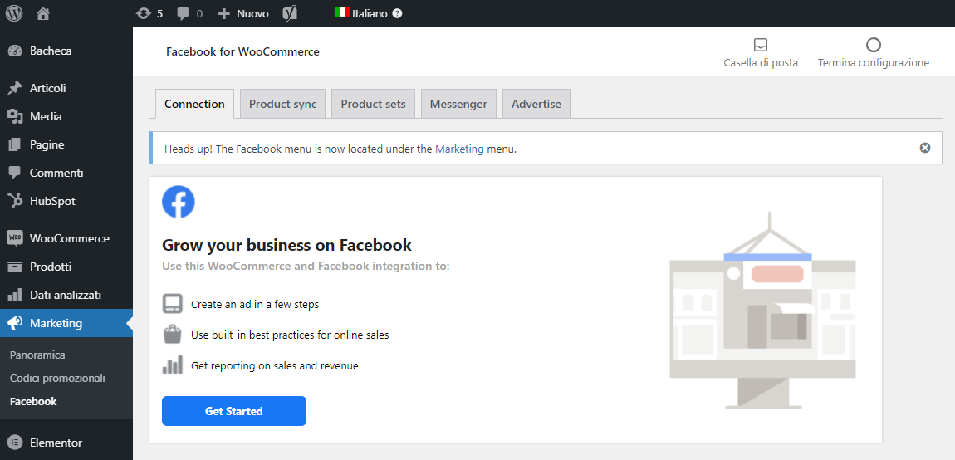
Once installed the following screen will appear.
N.b. Procedures reported by Facebook tech support recommend enabling automatic updates to have the latest version of the plugin installed automatically.
We strongly advise against enabling automatic updates of plugins you install on WordPress.
with the passage of time, new releases for both WordPress and WooCommerce are released all the time.
Before upgrading the various plugins, it is essential to check compatibility with both WordPress / WooCommerce and the other plugins installed.
If you do not have a staged version (development environment), it is recommended that you back up your entire website before making updates.
Now you can proceed to setup the plugin, simply click “Get Started.”
Below is the configuration of the Facebook plugin for WooCommerce, broken down into the individual steps.
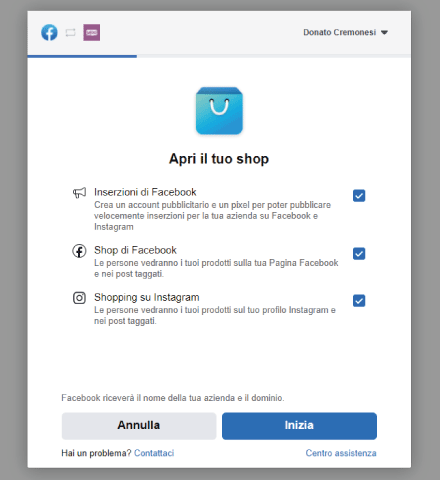
Step 1
Select all options if you want to manage both ads and Shop on Facebook and Instagram.
Step 2
Select your Business Manager. To best manage your Facebook and Instagram Accounts, it is essential to create your Account on Business Manager, if not yet available.
If, like us, you have access to several Business Managers, choose the one to which you want to link your online store made with WooCommerce.

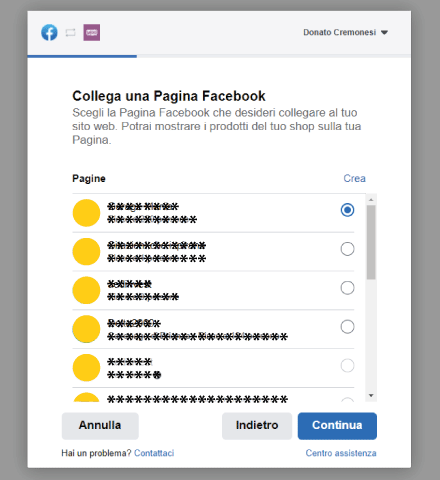
Step 3
Select the Facebook Page to be linked.
Step 4
Select the Instagram Page to be linked.

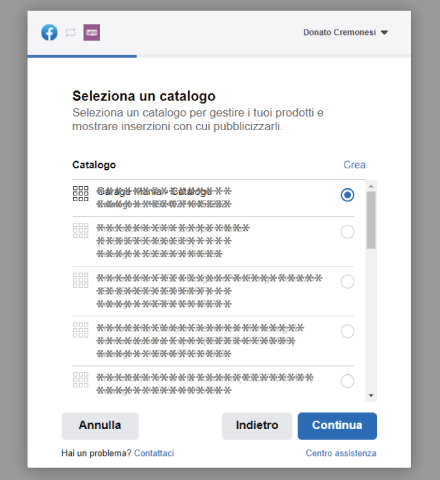
Step 5
If it manages only your Company’s account, only one entry will appear.
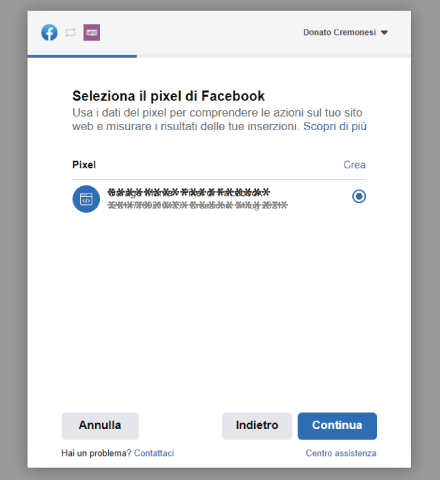
Step 6
Setup WooCommerce Facebook pixel. Using the Facebook Pixel allows you to perform data tracking and analysis.
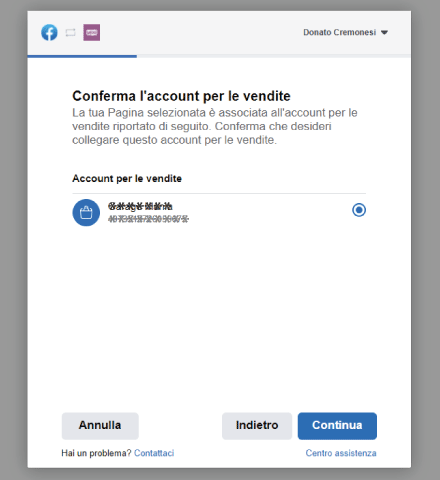
Step 7
You have almost finished the process.
You need to confirm the Account for sales.
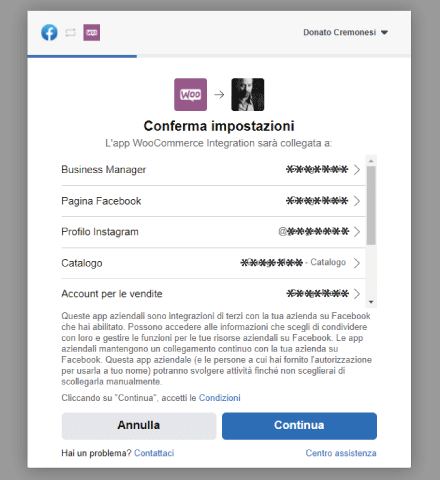
Step 8
This screen summarizes all the links you are about to create.
Take a moment and verify that you have selected the correct Accounts, especially if you manage multiple Pages and/or Business Managers.
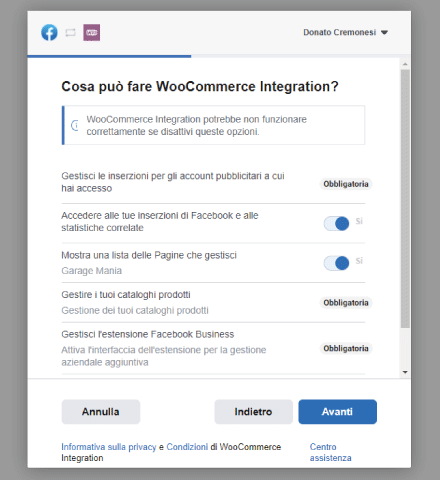
Step 9
As you can see some parameters are mandatory and others optional.
In my opinion, it is better to leave the configuration as you see in the image, so that the most information can be tracked.
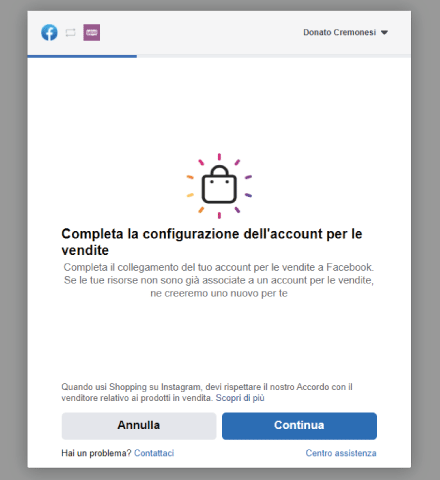
Step 10
Let’s say that the procedure could have been carried out with a few fewer steps.
Basically, we need to give further confirmation.
Step 11
Well the configuration of the Facebook Plugin for WooCommerce has come to an end.
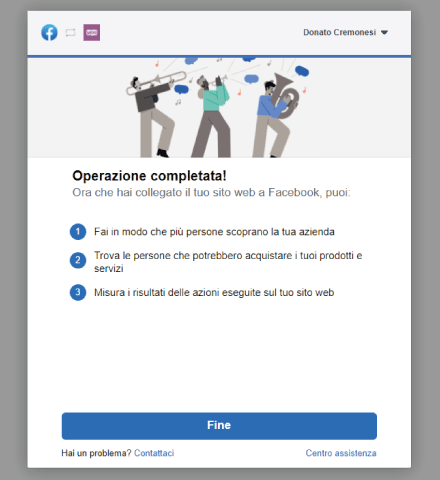
Step 12
Congratulations now you can sell the products you posted on your online store created with WooCommerce, directly in Facebook and Instagram Shops.
We analyzed, together, how to use Facebook for WooCommerce to connect our online store made with WooCommerce to Facebook and Instagram.
Now let’s see the setup of the plugin that will allow us to manage the WooCommerce Facebook Shop and its product catalog and product feed.
To sell online do a check of your WooCommerce catalog
Before analyzing the procedure for synchronizing products on Facebook, it is important to say that an online catalog must be structured and well-organized into categories.
User experience, what is also referred to as user experience, is critical to the success of your e-shop.
Users are used to finding everything right away, otherwise they move on to the next shop.
This is a practice that puts the end user at the center, as we will be the ones to meet their needs.
In addition, it is a very effective technique for acquiring new customers and increasing online sales of our websites.
For this reason, it is important that the product sheets uploaded to your e-commerce are complete with:
- Descriptive images
- Product Description.
- Technical information
Each item included in the online catalog must be drafted according to the SEO Strategy for E-commerce to ensure its indexing on search engines.
If you want to find out how to do SEO of a Product, I invite you to read this article: Product Page SEO
Setup of your WooCommerce catalog
To set up your new catalog access the “Product Sync” section as shown in the image below by clicking: Marketing > Facebook > Product Sync.
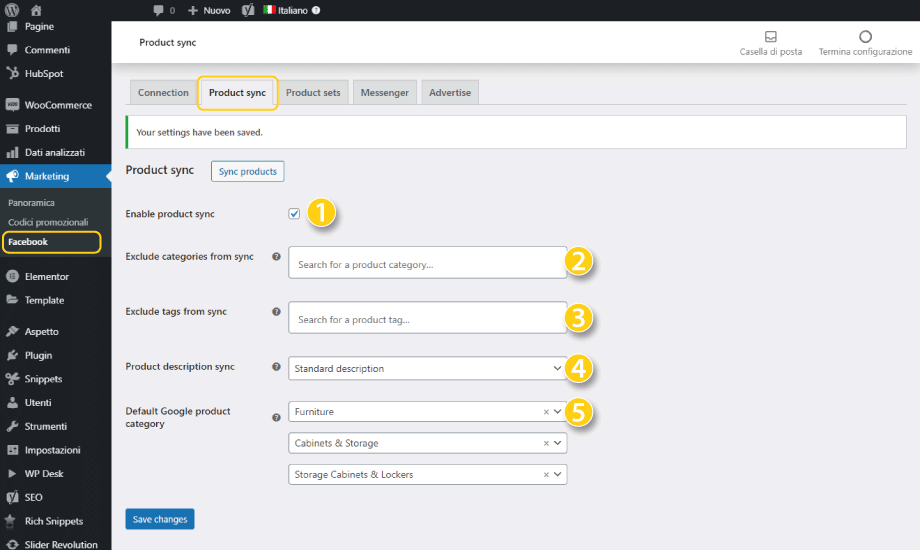
As you can see there are five distinct areas.
- “Enable product sync” if you want to synchronize your Catalog with Facebook this item must be selected.
- “Exclude categories from sync” You can select the product categories that you do not want to publish on Facebook and Instagram Shops.
- “Exclude tags from sync” Sometimes we do not wish to publish the entire Catalog. The exclude based on TAGs function allows us to select some products based on a specific TAG.
- “Product description sync” You can select whether to use the long description of the Product, or the short description.
- “Default Google product category” Select the main category you belong to, and then subcategories as you go along, to better profile your products (product pages).
Google Products Categories (GPC) codes are required for proper tax calculation. GPC information can be set either at the global product level, or at the individual level.
Product data management with WooCommerce Feed Facebook and Instagram
If you want, you can customize every single product in your e-store.
Simply enter the relevant tab. Installing the Facebook for WooCommerce Plugin adds a new section to your product tab.
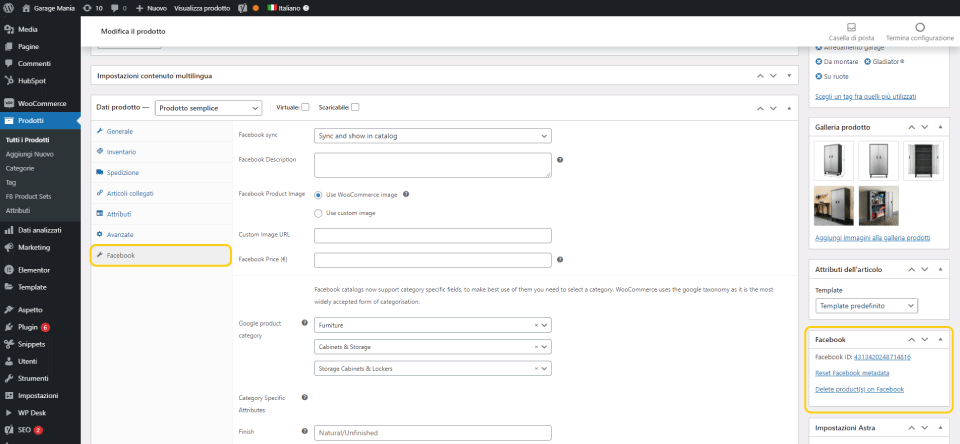
By clicking on “Facebook” (yellow box on the left) you can customize each piece of information, including the categories and subcategories the product belongs to.
In the yellow box on the right, information about synchronization is shown.
N.B. If the“Facebook Description” and“Facebook Price” fields are not filled in, the default product tab information will automatically be imported.
Facebook FB Product Set: How to Create a Product Collection/Set
FB Product Sets are basically collections that group your products within your online store.
For example, you can create an FB Product Set for promoted products, or group items by trends, seasons, etc.
You can manage your collections in the plugin from Products > FB Product Sets.
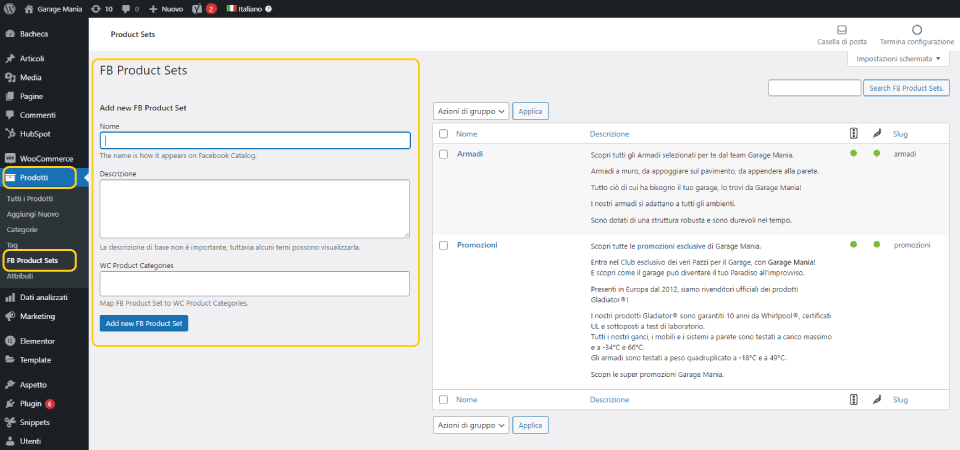
To create a new FB Product Set, simply:
- Specify the name of the set
- Enter the description
- Select the Product Category we want to automatically add to that specific collection.
N.B. If you have installed a plugin such as Yoast SEO, remember to do the FB Product Set SEO as well.
Why choose WordPress and WooCommerce to build your own online store
Are WordPress and WooCommerce the best solution on the market?
I would say no. Certainly there are plenty of suites that were born specifically for building your own online store.
Before choosing which software to use, it is essential to understand what our online store will look like.
- How many products do we want to sell?
- In how many languages?
- How will it be organized?
- How many currencies will he have to handle?
- How do I integrate it with the billing system?
- How do I manage the shipping and logistics of my products?
- What promotional activities do I plan to do to seek customers and increase sales?
These are just some of the questions behind the choice of the ideal program to develop our e-commerce.
An important discriminator in choosing, or not, WooCommerce lies in the number of products to be managed.
If you planned to upload 5,000/10,000 products to your new online store, no problem.
If the number is definitely higher I would lean towards other solutions.
Do you have an e-commerce business and want to find out how to increase sales? Read here:
- SEO Consulting for WooCommerce
- Increasing eCommerce sales: 8-step strategy
- Abandoned WooCommerce carts: Which Plugins to best manage them!
- WooCommerce Hubspot handles abandoned shopping carts
- WooCommerce vs Shopify with a look at SEO
- WooCommerce Merchant Center: boosts online business
- Facebook for WooCommerce, the Plugin to boost sales
- International SEO for a multilingual strategy
- SEO product tab: optimization for WooCommerce