If you sell online, you can increase your revenue through abandoned cart management with WooCommerce Hubspot.
If you are reading this article you probably typed one of these keywords:
- woocommerce hubspot integration
- hubspot woocommerce integration
- hubspot woocommerce
- sync woocommerce data with hubspot
- leads customers and abandoned carts
Before we begin, it is important to specify that automation is something that can be applied to so many different streams.
Factory Communication chose the HubSpot platform, not only because it is based on a very powerful CRM (Customer Relationship Management), but also and especially because it enables Business Automation.
That is, to automate all flows and operations that take place in the Company.
Not only those related to Marketing and Communication Strategies, but also customer care, technical support, design departments, production, etc.
Clearly, in all these operations, e-commerce-related flows hold an important aspect.
HubSpot integrates with the most important e-commerce platforms on the market.
At Factory Communication, we have chosen to develop and integrate e-commerce based exclusively on WordPress and WooCommerce.
Check out the section of our site here E-Commerce Realization
WooCommerce Hubspot: The integration that boosts your shopping cart conversions
To perform workflow automation in your business, you need HubSpot Professional version and WooCommerce.
After you connect your WooCommerce store with HubSpot, you’ll be ready to re-attract your customers (customers based), keep them coming back to your online store, and automate tasks to prevent cart abandonment.
Let’s begin.
Hubspot WooCommerce integration: 7 steps to automate abandoned cart management
- Connect your e-commerce platform to HubSpot
- Set up groups and properties in HubSpot
- Check the properties set in HubSpot
- Create a list of abandoned carts in HubSpot
- Create retargeting of your customers with personalized abandoned cart emails
- Configure abandoned cart workflow with HubSpot
- Keep track of your abandoned shopping carts
1. Connect your WooCommerce platform to HubSpot.
The first step to perform the abandoned cart setup is to connect HubSpot to your online store, built with WooCommerce.
To do this, go to the HubSpot settings highlighted by the yellow arrow.

From the menu of “Integrations,” select “Connected App” (purple arrow on the left).
Then access the Marketplace (purple arrow at the top right), where you can find hundreds of applications that can be integrated into HubSpot, even for free.
In HubSpot’s Marketplace, enter “WooCommerce” as a search term.
Several very interesting integrations will appear, including WooCommerce by MakeWebBetter.

Click on “Install app” to proceed to install the Plugin.

You will be redirected to the page where you can download the Plugin to upload to WordPress.

Proceed to upload and install the Plugin on WordPress.

Once the Plugin is loaded, activate it, and click on Settings.
You will be redirected to the integration page between WooCommerce and HubSpot, where you will be asked to connect your HubSpot account.

Click on “Connect Your Account” to authorize the connection.
Now we are ready to do the setup, and optimize the integration of HubSpot with WooCommerce.
2. Set up groups and properties in HubSpot (creating groups).
As you can see, the connection between HubSpot and WooCommerce uses a wizard path, which allows us to run the right setup.
To view WooCommerce data in HubSpot, we need to set up properties and groups in the HubSpot account.

The process of aligning groups and properties in HubSpot may take a few minutes.

The next step, “Step 3,” allows you to create lists for the management of Contacts in HubSpot.

The last step, “Step 4,” allows you to synchronize the data in WooCommerce with HubSpot.
You can decide to run it now by clicking “SYNC NOW” or run it later by clicking “SKIP.”

The alignment procedure between WooCommerce and HubSpot ,may take a few minutes.
It depends on the amount of data in WooCommerce.

When you finish, a profiling form will appear that you can fill out, or go further by clicking the “SKIP FOR NOW” button.
The WooCommerce Data Synchronization Procedure with HubSpot is finished.
By clicking on “VISIT DASHBOARD,” you can see the data in WooCommerce that has been synchronized and imported into HubSpot.
In this case, since it was a newly created E-commerce, HubSpot imported only 26 master records and 1175 products.

Technical notes regarding the import of data present in WooCommerce.
If you have old products in your online store that are not posted on the site and that you no longer use, you may want to remove them.
You would unnecessarily soil the data imported into HubSpot.
If you have quite a lot of data in WooCommerce (master records of people, products, orders, users, etc.), the procedure may take up to a few days.
Don’t worry. The alignment procedure works in the background, and will not slow down your e-commerce.
By clicking on “SETTINGS” (the last button on the right of the DASHBOARD menu), you can perform a meticulous setup of the information you want to import into HubSpot.
3. Check the properties set in HubSpot
As a first step, let’s look at the list of properties related to the Abandoned Cart, automatically created in HubSpot.

In fact, simply go to the Settings section of HubSpot (little wheel at the top), and click the “Properties” button in the left menu.
HubSpot will show you the properties related to “Contacts” as the first view.
As you can see, the list of properties created to manage cart abandonment is definitely rich and exhaustive.
Abandoned cart properties (order status) that synchronize with HubSpot
- Current abandoned trolley
- Date cart abandoned
- Abandoned cart counter
- URL of the abandoned shopping cart
- SKU products cart abandoned
- Abandoned cart product categories
- Products from the abandoned cart
- Abandoned Cart HTML products
- Fiscal value of the abandoned trolley
- Subtotal abandoned cart
- Total abandoned cart value
This is how the abandoned cart properties were created in HubSpot.
4. Create a list of abandoned carts in HubSpot.
And here we come to the stage of creating lists in HubSpot, which allow us to group and manage contacts.
As you can see, by accessing the lists section from Contacts, the HubSpot and WooCommerce integration has already generated the first lists.

If you have been using HubSpot for a short time, it is strategic to start getting familiar with this important tool.
Lists in HubSpot are of 2 types:
HubSpot Active List
These are dynamic lists, that is, they allow us to filter contacts based on a set of parameters of interest to us. Lists can be generic, or they can be extremely profiled.
For example:
- All users who have subscribed to the newsletter. Properties to filter: Form submissions > Choose Form (you can choose all contact forms, or a specific form)
- All newsletter subscribers who arrived at our website through a Google search. Add an additional property: Original Source > Organic Search
And so on.
Whenever a contact meets the properties we entered, it is automatically added to the list.
Conceptually, HubSpot’s Active Lists are used to segment your contacts acquired through WooCommerce, based on characteristics and buying behavior.
This is why they are called “smart.” In fact, they update automatically when the contact meets certain criteria.
HubSpot Static List
These are static lists, i.e., we are the ones who add contacts to the list manually and completely independently.
The pre-set Active lists (dynamic lists) that we can activate are really many, and they meet all possible needs.
Simply go back to the HubSpot section of your Web site, select the SETTINGS button and then the MANAGE button on the lists.
N.B. if you want to find out how to make the most of your newsletters, to increase sales and turnover I recommend you read this article: Want to increase your users’ loyalty? Send out your newsletters with HubSpot

Of course, we can always create dynamic lists on our own.
5. Sell online: retargeting with personalized emails to users who have abandoned the cart
Now, your list has been successfully created, the data is synchronized.
The next step, is to create a series of emails to send to your contacts who have not completed the purchase.
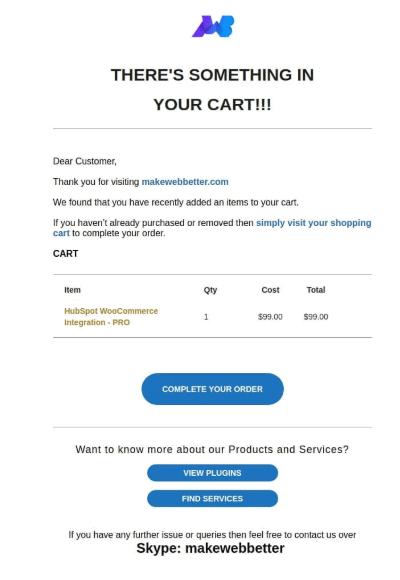
This image represents the email that the Make Web Better company sends, whenever a user abandons their shopping cart.
The key thing, is that your emails are personalized and targeted.
Thanks to HubSpot, you can access lots of pre-customized email templates.
Make Web Better also makes available some ready-made templates.
And now we come to the main point.
6. Workflow creation in Hubspot for abandoned carts.
After setting up automated emails (marketing automation) and contact lists, it is time to set up the workflow for cart abandonment (abandoned cart).
Thanks to the integration between HubSpot and WooCommerce, built with the WooCommerce by MakeWebBetter plugin, you can generate automated workflows (automate workflows) for managing abandoned shopping carts.
Simply re-enter the HubSpot section, found on your website, and click on the “AUTOMATION” button.

Click on “Create” of the stream you are interested in.
“WooCommerce: MQL to Customer lifecycle stage Conversion”
This workflow is designed to get a lead qualified to make the first purchase.
WooCommerce: Welcome New Customer & Get a 2nd Order
This workflow is triggered after the first purchase, and is designed to incentivize the customer to make a second purchase.
WooCommerce: 2nd Order Thank You & Get a 3rd Order
This workflow is designed in perfect Inbound Marketing philosophy. It is activated after the second purchase, and is designed to thank customers (woocommerce customers) who become repeat buyers.
WooCommerce: 3rd Order Thank You
Useful flow for thanking users who made the 3rd purchase.
WooCommerce: ROI Calculation
This workflow is extremely important, as it allows us to perform the ROI calculation.
N.B. Workflow management depends on the HubSpot plan you have selected. If you want to use Workflows in the best way possible, it is essential to activate the Professional version.

7. Keep track of abandoned carts even by guest users
This last step in our process is extremely important, because it also tracks carts abandoned by guest users. That is, by those who have not registered.

Procedure to enable the management of carts abandoned by unregistered users:
- To enable abandoned cart monitoring, go to the plug-in dashboard, and go to the Abandoned Carts tab.
- Click the checkbox, to enable abandoned cart tracking.
- Click the checkbox to enable monitoring of the cart abandoned by the guest user.
- Set the timer for the abandoned cart to be synchronized to HubSpot. The minimum time interval is 5 minutes.
Now, with the integration between HubSpot CRM and your WooCommerce Store, you can greatly increase your business.
In fact, not only can you manage abandoned carts, but you can also create automatic workflows that lead your customer to make a second or third purchase.
I hope this article can help you to increase your sales and turnover.
For any further information, please comment on this article listing your concerns. Our team will respond to your inquiries as soon as possible.
Want to integrate your e-commerce with HubSpot, and still have some questions or concerns?
Factory Communication is HubSpot Agency Partner.
Book a free consultation directly on my calendar.
The right message, at the right time, to the right person
To be properly positioned, means to reach your potential target audience, to win the competition, to increase your market share.
Do you sell online? Read more articles on how to launch your e-commerce?
- Abandoned WooCommerce carts: Which Plugins to best manage them!
- Increasing eCommerce sales: 8-step strategy
- How to realize the SEO of images for Google
- Using the Flywheel as a tool for growth
- Increase conversions and commerce with HubSpot CRM
- WooCommerce vs Shopify with a look at SEO
- SEO Consulting for WooCommerce
- Creating an e-commerce site to sell online: a guide for Entrepreneurs
- Ultimate SEO checklist for Your E-commerce!